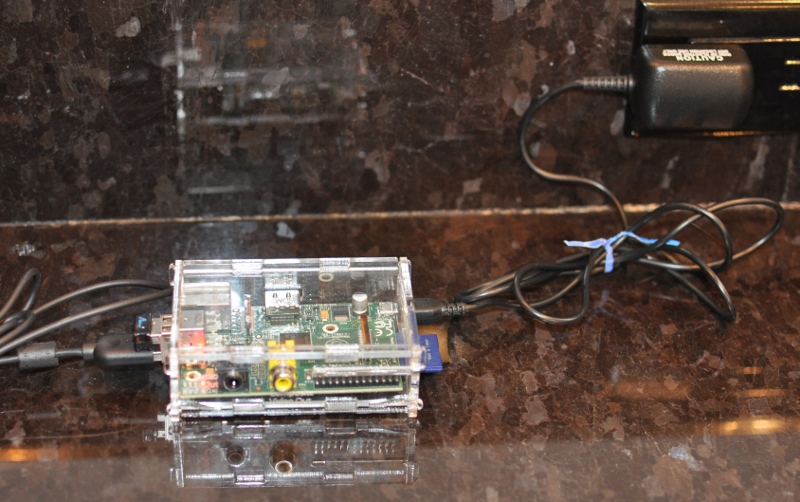
Remote Raspberry Pi access free is a powerful solution that allows users to control their Raspberry Pi devices from anywhere in the world without incurring extra costs. Whether you're a hobbyist, developer, or professional, understanding how to set up remote access for your Raspberry Pi can significantly enhance your productivity and flexibility. This guide will walk you through everything you need to know about setting up and managing free remote access for your Raspberry Pi.
With the growing popularity of IoT (Internet of Things) devices and remote work, the demand for remote management solutions has skyrocketed. Raspberry Pi, a versatile and affordable single-board computer, has become a go-to device for various projects ranging from home automation to web servers. However, the ability to access your Raspberry Pi remotely is essential for maintaining and troubleshooting your setup.
In this article, we will explore the concept of free remote Raspberry Pi access, discuss various methods to achieve it, and provide step-by-step instructions to help you get started. By the end of this guide, you'll have the knowledge and tools necessary to securely connect to your Raspberry Pi from any location without spending a dime.
Read also:Unveiling The Extraordinary Life Of Virginia Donohoe
Table of Contents:
- Introduction to Remote Raspberry Pi Access
- Why Choose Free Remote Raspberry Pi Access?
- Methods for Remote Raspberry Pi Access Free
- Using SSH for Free Remote Raspberry Pi Access
- Setting Up Ngrok for Remote Access
- Exploring LocalTunnel for Free Access
- Ensuring Security in Remote Raspberry Pi Access
- Troubleshooting Common Issues
- Comparison of Free Remote Access Methods
- Conclusion and Next Steps
Introduction to Remote Raspberry Pi Access
Remote Raspberry Pi access refers to the ability to connect to and control your Raspberry Pi device from a remote location using the internet. This functionality is particularly useful for managing headless Raspberry Pi setups, where the device operates without a monitor, keyboard, or mouse. By enabling remote access, you can perform tasks such as file transfers, software updates, and system maintenance from anywhere in the world.
Benefits of Remote Access
Here are some key benefits of remote Raspberry Pi access:
- Convenience: Manage your Raspberry Pi without needing physical access to the device.
- Cost-Effective: Free remote access solutions eliminate the need for paid subscriptions or expensive hardware.
- Flexibility: Work on your projects from any location, whether you're at home, in the office, or traveling.
Common Use Cases
Remote Raspberry Pi access is widely used in various applications, including:
- Home automation systems
- Web server management
- IoT device monitoring
- Remote data collection
Why Choose Free Remote Raspberry Pi Access?
While there are several paid solutions available for remote Raspberry Pi access, opting for free alternatives offers several advantages:
Firstly, free solutions are cost-effective, making them ideal for hobbyists and small-scale projects. Additionally, many free tools are open-source, allowing users to customize and enhance the software to suit their specific needs. Furthermore, free remote access methods often provide the same level of functionality as paid options, making them a viable choice for most users.
Read also:Louisa Ainsworth The Rising Star Redefining Modern Entertainment
Comparison with Paid Solutions
Paid remote access solutions may offer additional features such as enhanced security, technical support, and advanced functionality. However, for many users, free alternatives provide sufficient capabilities without the added expense.
Methods for Remote Raspberry Pi Access Free
There are several methods for achieving free remote Raspberry Pi access. In this section, we will explore some of the most popular and effective options:
SSH (Secure Shell)
SSH is a widely used protocol for securely accessing and managing remote devices. It provides encrypted communication between your local machine and the Raspberry Pi, ensuring data privacy and security.
Ngrok
Ngrok is a free tool that allows you to expose local servers to the internet, enabling remote access to your Raspberry Pi. It is easy to set up and offers a simple interface for managing connections.
LocalTunnel
LocalTunnel is another free option for exposing local servers to the internet. It is lightweight and requires minimal configuration, making it an excellent choice for beginners.
Using SSH for Free Remote Raspberry Pi Access
SSH is one of the most reliable and secure methods for remote Raspberry Pi access free. Below are step-by-step instructions for setting up SSH on your Raspberry Pi:
Step 1: Enable SSH on Raspberry Pi
To enable SSH on your Raspberry Pi, follow these steps:
- Boot up your Raspberry Pi and log in to the operating system.
- Open the Raspberry Pi Configuration tool by typing
sudo raspi-configin the terminal. - Navigate to the "Interfacing Options" menu and select "SSH."
- Choose "Yes" to enable SSH and reboot your Raspberry Pi.
Step 2: Find Your Raspberry Pi's IP Address
To connect to your Raspberry Pi via SSH, you need to know its IP address. You can find this information by typing hostname -I in the terminal.
Step 3: Connect to Raspberry Pi Using SSH
Once SSH is enabled and you have the IP address, you can connect to your Raspberry Pi using an SSH client such as PuTTY (Windows) or the built-in terminal (Mac/Linux). Use the following command:
ssh pi@
Setting Up Ngrok for Remote Access
Ngrok is a powerful tool for exposing local servers to the internet. Here's how to set it up for free remote Raspberry Pi access:
Step 1: Install Ngrok
Download and install Ngrok on your Raspberry Pi by following the instructions on the official website.
Step 2: Start Ngrok
Once installed, start Ngrok by running the following command:
./ngrok tcp 22
Step 3: Connect to Raspberry Pi via Ngrok
Ngrok will provide you with a public URL that you can use to connect to your Raspberry Pi from any location. Use this URL in your SSH client to establish a secure connection.
Exploring LocalTunnel for Free Access
LocalTunnel is a lightweight alternative to Ngrok for exposing local servers to the internet. Here's how to use it:
Step 1: Install LocalTunnel
Install LocalTunnel on your Raspberry Pi using npm (Node Package Manager):
npm install -g localtunnel
Step 2: Start LocalTunnel
Run the following command to start LocalTunnel:
lt --port 22
Step 3: Connect to Raspberry Pi via LocalTunnel
LocalTunnel will generate a public URL that you can use to connect to your Raspberry Pi. Use this URL in your SSH client to access your device remotely.
Ensuring Security in Remote Raspberry Pi Access
Security is a critical consideration when setting up remote Raspberry Pi access free. Here are some best practices to ensure the safety of your device:
- Use strong, unique passwords for your Raspberry Pi account.
- Enable two-factor authentication (2FA) whenever possible.
- Regularly update your Raspberry Pi's operating system and software.
- Use a firewall to restrict access to your device.
Encryption and Authentication
Always use encrypted connections, such as SSH, to protect your data during transmission. Additionally, consider using public key authentication instead of passwords for added security.
Troubleshooting Common Issues
Even with careful setup, issues may arise when attempting to access your Raspberry Pi remotely. Below are some common problems and their solutions:
Problem: Unable to Connect via SSH
Solution: Verify that SSH is enabled on your Raspberry Pi and check your IP address for accuracy. Ensure that your firewall settings allow incoming SSH connections.
Problem: Ngrok or LocalTunnel Not Working
Solution: Ensure that Ngrok or LocalTunnel is installed correctly and running on your Raspberry Pi. Check for any errors in the terminal output and consult the official documentation for troubleshooting tips.
Comparison of Free Remote Access Methods
Choosing the right method for remote Raspberry Pi access free depends on your specific needs and preferences. Below is a comparison of the three methods discussed in this article:
| Method | Ease of Use | Security | Customization |
|---|---|---|---|
| SSH | Medium | High | High |
| Ngrok | High | Medium | Low |
| LocalTunnel | High | Medium | Low |
Conclusion and Next Steps
In conclusion, free remote Raspberry Pi access is a valuable tool for managing and maintaining your Raspberry Pi devices from anywhere in the world. By following the steps outlined in this guide, you can set up secure and reliable remote access using SSH, Ngrok, or LocalTunnel.
We encourage you to experiment with these methods and determine which one best suits your needs. Don't forget to prioritize security when setting up remote access to protect your Raspberry Pi from unauthorized access.
Feel free to leave a comment below if you have any questions or suggestions. Additionally, consider exploring other articles on our website for more tips and tutorials on Raspberry Pi and related technologies.
References: